Instructions
Install python 3, python3-pip and python3-dev
Installing python3 will update to the latest version of Python 3, and python3-pip will install Pip3 which allows us to manage Python packages we would like to use. Some of Jupyter’s dependencies may require compilation, in which case you would need the ability to compile Python C-extensions, so we are installing python-dev as well.
sudo apt-get install -f python3 python3-pip python3-dev
To verify that you have python and pip installed:
python3 --version
pip3 --version
Install packages
sudo apt-get install -f build-essential python3-dev python3-setuptools python3-numpy python3-numpy-dev python3-scipy libatlas-dev libatlas3gf-base libfreetype6-dev libpng-dev g++ python3-matplotlib python3-pandas

sudo -H pip3 install scikit-learn
To upgrade:
sudo -H pip3 install --upgrade pandas
sudo -H pip3 install matplotlib --upgrade
Install seaborn
Download latest version of seaborn .tar.gz
tar -xzf seaborn-file.tar.gz
cd seaborn-path/
sudo python3 setup.py install
Install xgboost
git clone --recursive https://github.com/dmlc/xgboost
cd xgboost; cp make/config.mk ./config.mk; make -j4
python setup.py develop --user
Install tensorflow with virtualenv
https://www.tensorflow.org/install/install_linux
sudo apt-get install -f python-pip python-dev python-virtualenv
# target diectory
virtualenv --system-site-packages tensorflow3
# (tensorflow3)$
source ~/tensorflow3/bin/activate
# pip version lower than 8.1 Python 2.7  and cpu only
sudo pip3 install --upgrade https://storage.googleapis.com/tensorflow/linux/cpu/tensorflow-1.0.1-cp34-cp34m-linux_x86_64.whl
Activate the virtualenv environment each time you use TensorFlow
source ~/tensorflow3/bin/activate
You shoul get something like this: (tensorflow3)$
To deactivate:
deactivate
Validate your tensorflow installation
Active your container
python
>>> import tensorflow as tf
>>> hello = tf.constant('Hello, TensorFlow!')
>>> sess = tf.Session()
>>> print(sess.run(hello))

>>> Hello, TensorFlow!
Uninstalling TensorFlow
rm -r targetDirectory
Install pydot and graphviz (for NN graph)
sudo -H pip3 install pydot pydot-ng graphviz
Install plotly (for EDA)
sudo -H pip3 install plotly
Install keras
https://keras.io/#installation
Required dependencies
- numpy, scipy
- yaml
- HDF5 and h5py (optional, required if you use model saving/loading functions)
- Optional but recommended if you use CNNs: cuDNN.
sudo apt-get install -f python3-yaml
sudo apt-get install -f python3-h5py
Install keras
sudo -H pip install keras
If any error --> Upgrade pip to the latest version
sudo -H pip3 install --upgrade pip
Installing Ipython
sudo apt-get install -f ipython ipython-notebook
Installing Jupyter Notebook
-H, --set-home Request that the security policy set the HOME environment variable to the home directory specified by the target user's password database entry. Depending on the policy, this may be the default behavior.
sudo -H pip3 install jupyter
If any error --> Upgrade pip to the latest version
sudo -H pip3 install --upgrade pip
Try installing Jupyter again
sudo -H pip3 install jupyter
Running Jupyter Notebook
jupyter notebook
Using a virtualenv in an IPython notebook (install kernels)
https://help.pythonanywhere.com/pages/IPythonNotebookVirtualenvs/
source ~/tensorflow3/bin/activate
python3 -m ipykernel install --user
python -m ipykernel install --user --name tensorflow3 --display-name "Python 3 (tensorflow)"
Using Jupyter Notebook
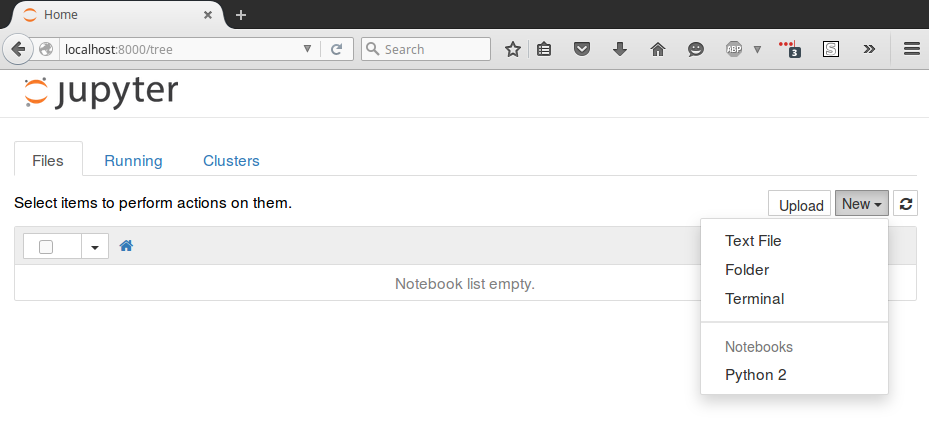
Automatically, Jupyter Notebook will show all of the files and folders in the directory it is run from.
To create a new notebook file, select New > Python 2 from the top right pull-down menu.
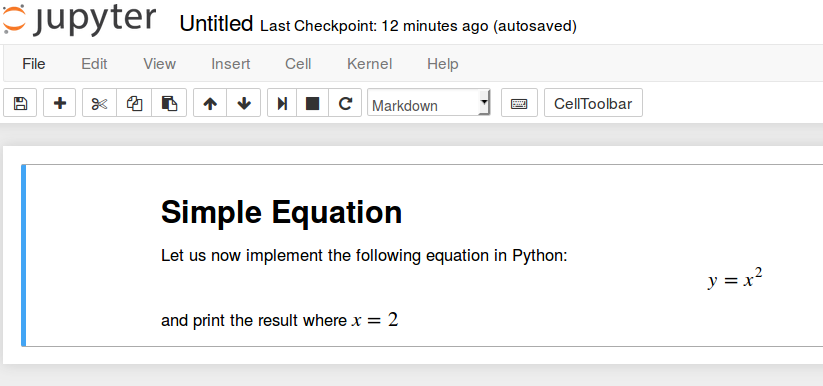
This will open a notebook. We can now run Python code in the cell or change the cell to markdown. For example, change the first cell to accept Markdown by clicking Cell > Cell Type > Markdown from the top navigation bar. We can now write notes using Markdown and even include equations written in LaTeX by putting them between the $$ symbols. For example, type the following into the cell after changing it to markdown:
# Simple Equation

Let us now implement the following equation:
$$ y = x^2$$

where $x = 2$
To turn the markdown into rich text, press CTRL+ENTER:
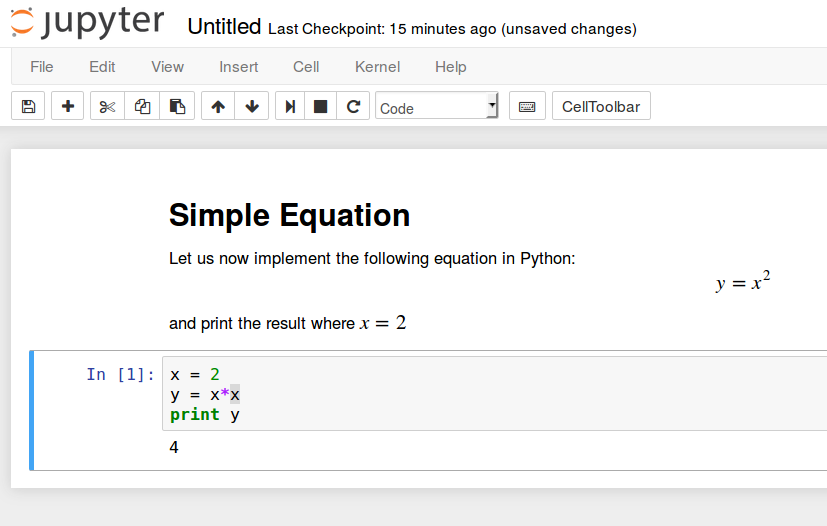
You can use the markdown cells to make notes and document your code. Let's implement that simple equation and print the result. Select Insert > Insert Cell Below to insert and cell and enter the following code:
x = 2
y = x*x
print y